Introduction
Welcome to Arkai!
This guide will help you get started with building AI workflows using Arkai.
What is Arkai?
Arkai is a platform that allows you to build AI Workflows or AI Agents in a visual and intuitive way.
Arkai is designed to be flexible - you can combine different LLMs, tools, and custom logic to create workflows that match your specific needs. Whether you're building a simple chatbot or a complex AI agent, Arkai provides the building blocks you need.
With Arkai, you can build and run your workflow in our web platform, without worrying about the underlying AI infrastructure. Once you're ready, you can integrate your workflow into your own applications through our API with a few lines of code, no complex setup required.
As we develop the platform, we'll be adding different integrations to make it easier to use Arkai Workflows within your systems.
If you have any ideas or feature requests, please let us know in our Discord. We're always looking for feedback to improve the platform.
Key Concepts
At its core, Arkai is built around three key concepts:
Workflows
A workflow in Arkai is an executable function that processes inputs to generate outputs. Each workflow consists of components - the building blocks that represent individual processing steps. These components work together in sequence, with each one receiving data, performing specific operations, and passing results to the next step.
A workflow is created and edited in the workflow editor. To access the workflow editor you can just select any workflow in the marketplace or in your dashboard, and slide down the playground, in that way you will be able to edit the workflow selected. If you want to create a new workflow, you can click on the 'Create new workflow' button in the dashboard.
A workflow can be executed directly in the web platform, on what we call the 'playground'. In the workflow editor, you can press the 'Run' button to open the playground.

In the playground you can test your workflow and see how each component is executed. If you want, you can always run the workflow in the playground, it's made to be an intuitive and easy to use way to execute your workflows.
In Arkai, workflows can be shared with others. Through the marketplace, you can browse and use workflows created by others. Every workflow in the marketplace can be integrated into your own workflows, or you can 'fork' it and use it as a starting point for your own workflow, modifying it to fit your needs.
Components
Components are the building blocks that make up every workflow in Arkai. These can be AI models, tools, or even other workflows.
Adding components to your workflow is straightforward - simply drag them from the components bar and drop them into the workflow editor canvas.
Components can be configured by clicking on them to access their settings panel. Each component type has different configuration options - LLM components have extensive settings to control how they process text, while simpler components like Text Output only need to be connected to receive data from other components. You can customize input fields, data processing rules, and other settings to make the component behave exactly as needed for your workflow.
This demonstrates the configuration process for an LLM component.
Component Handles
Components connect and communicate through two types of handles:
-
Input Handles (Blue)
- Located on the left side of components
- Receive incoming data from other components
- Each input handle can accept multiple data types (text, images, etc.)
- Multiple inputs can feed into a single handle
-
Output Handles (Orange)
- Located on the right side of components
- Send processed data to other components
- Each output handle will have a specific data type
- A single component can have multiple output handles for different purposes
- Example: An LLM might have separate outputs for its response and metadata
You connect components by dragging from an output handle to an input handle, creating a data flow between components.
Component Categories
Components can be divided into three main categories:
1. Input Components
These components serve as the starting points of your workflow. They:
- Are identified by the 'Identifier' field in the component settings.
- Provide initial data to the workflow
- Have no input handles (since they're starting points)
- Have output handles to send data downstream
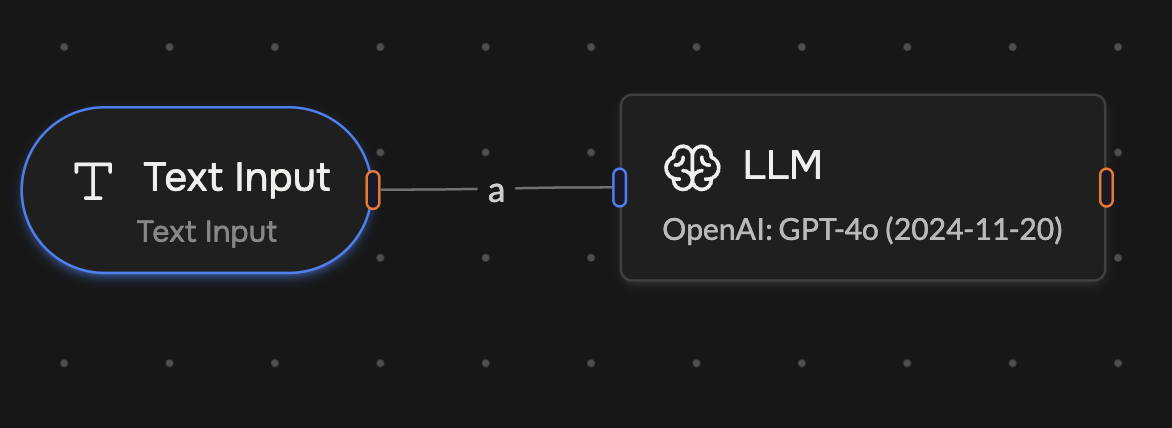
- Example: The 'Text Input' component can feed text into an LLM
2. Output Components
These components represent the endpoints of your workflow. They:
- Are identified by the 'Identifier' field in the component settings.
- Receive and display/store final results
- Have input handles to receive data
- Have no output handles (since they're endpoints)
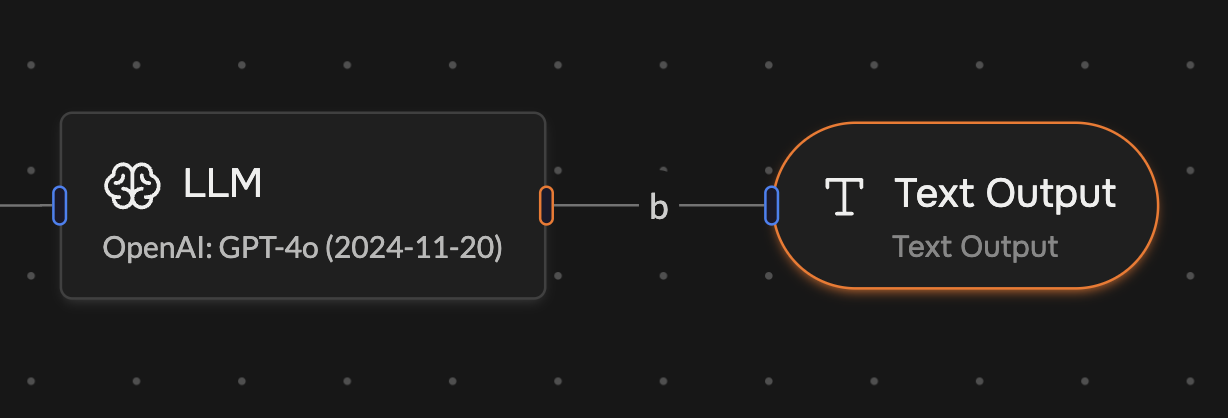
- Example: The 'Text Output' component can display LLM responses
3. Middleware Components
These components process data between inputs and outputs. They:
- Transform, analyze, or modify data
- Have both input and output handles
- Include components like LLMs, tools, and data processors
- Can be configured through various options to control their behavior
- Example: The 'LLM' component can process text using a LLM (seen in the images above)
Edges & Variables
Edges are the connections that allow data to flow between components in your workflow. When you connect two components together (by dragging from an output handle to an input handle), you create an edge. Each edge is automatically assigned a letter label (A, B, C, etc.) that identifies the data flowing through that connection.
These edge labels act as variables in your workflow. You can think of them like containers that hold whatever data is being passed between components. When you click on an edge, you can see:
- The edge's letter label
- The type of data flowing through it (text, image, etc.)
Different components have different rules about what types of data they can accept. For example:
- An Image Output component can only accept connections from components that output image data
- A Text Output component can only accept text data
- An LLM component accepts both text and image data
Using Variables in Components
Components handle these variables in different ways:
-
Automatic Components (like Text Output)
- Automatically use whatever data comes in through their input connection
- No configuration needed
-
Manual Components (like LLMs)
- Require you to explicitly reference variables in their settings
- Example: In an LLM's prompt field, you can use
{{c}}to insert data from the edge labeled "c"
Here's an example of how variables work in practice:
In this example, we connect two Text Input components to an LLM component. The LLM uses variables 'c' and 'd' in its prompt to compare the two input texts. This shows how variables let you combine data from multiple sources with custom instructions to create flexible workflows.
Each component's documentation will specify how to use variables within that component's settings. This variable system makes it easy to route and manipulate data throughout your workflow while keeping track of where information is coming from and going to.
Execution Logic
Now that you know the basic concepts of Arkai: workflows, components, edges and variables, let's explore how workflows are executed.
When you run a workflow, the execution follows these steps:
- The workflow initiates by activating all input components simultaneously
- Each input component sends its data through its output handle to connected components
- A component waits to execute until it receives data from all connections linked to the same input handle
- Once a component has all required inputs ready, it executes and forwards its results downstream
- This process cascades through the workflow until reaching output components
- Output components display or store the final results
Handling Empty Data
Components may sometimes output 'empty' data through their output handles. This can happen when:
- An Input component is left empty
- A conditional component's condition isn't met
- Other components produce no output for certain scenarios
By default, components will execute even when receiving empty data. However, you can modify this behavior using "Required Variables":
- Hover or select a component to see the Required Variables popup
- The popup shows all variables connected to each input handle
- Click on variables to mark them as required
- The component will only execute when all required variables contain data
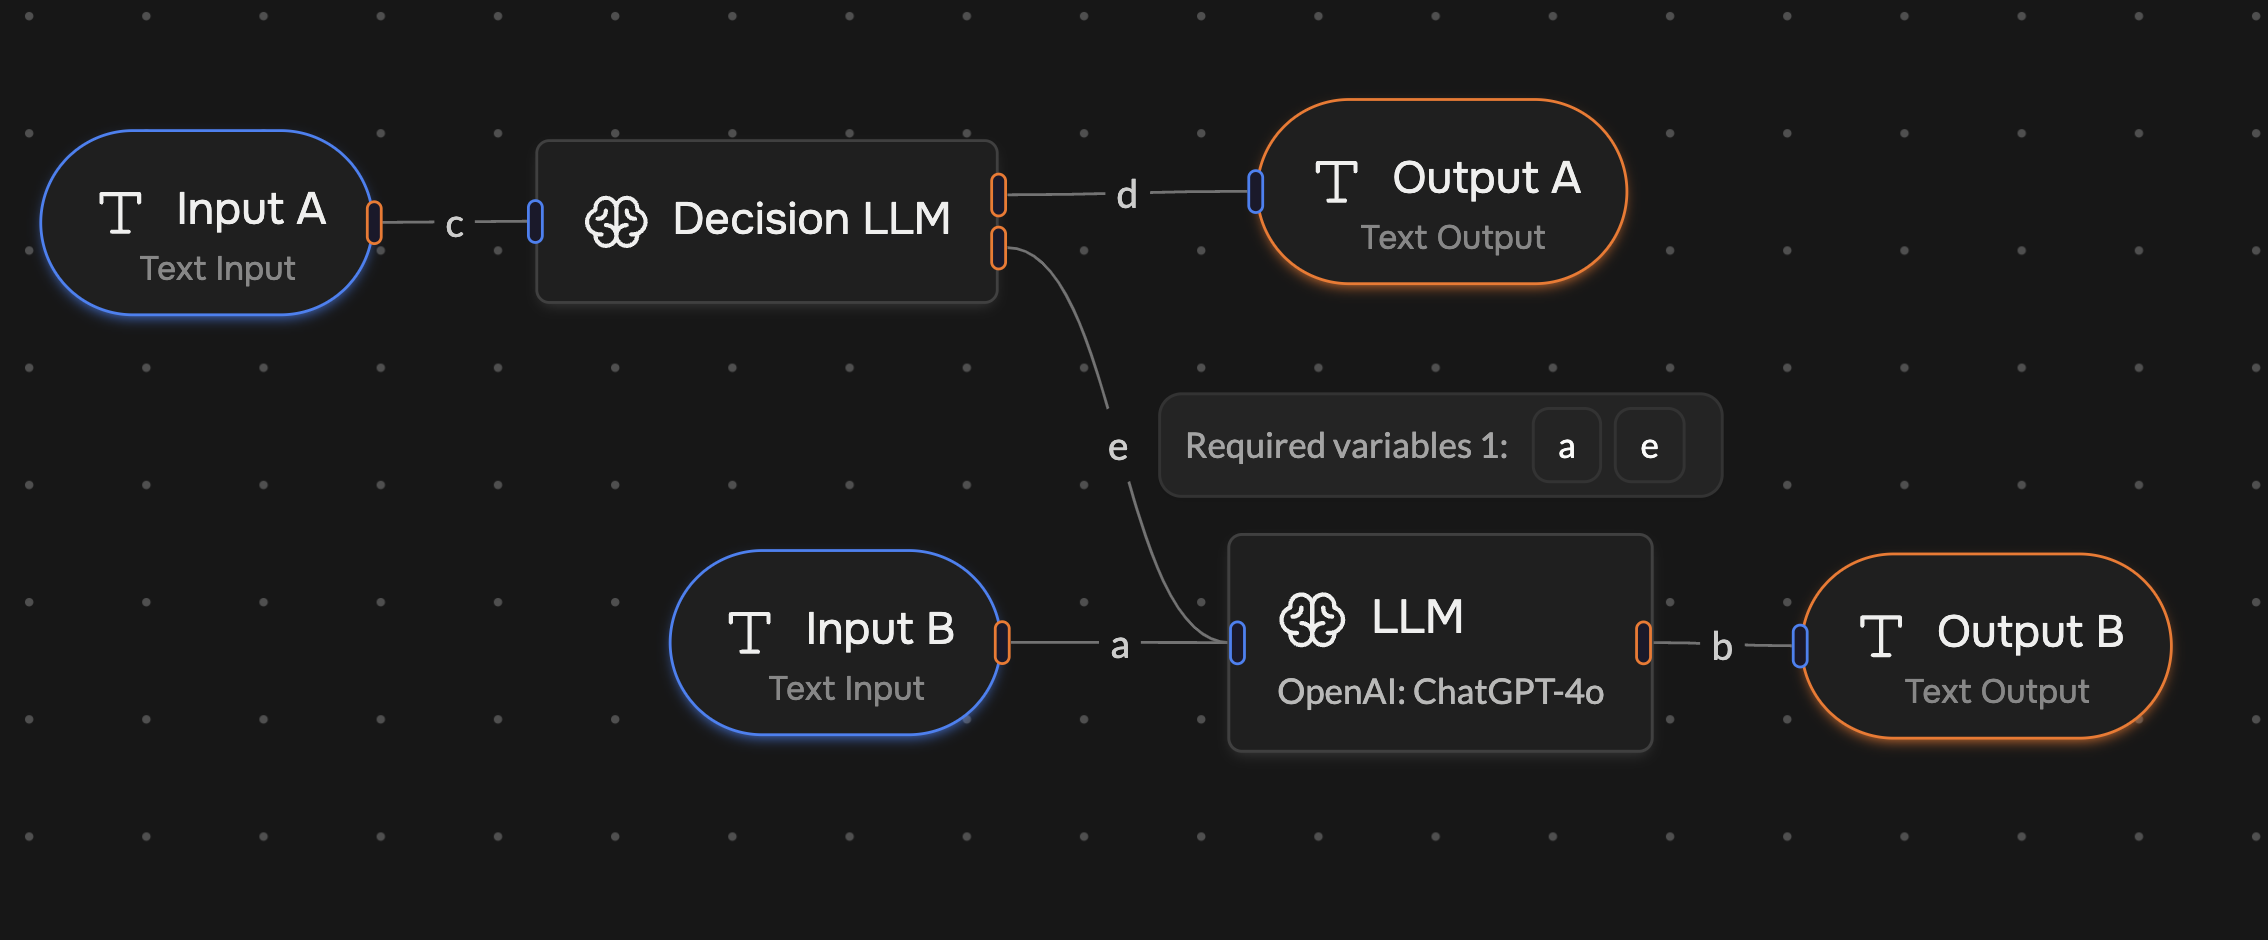
In the example below, if you want the LLM component to execute only when it receives data in the 'e' variable:
- Select the LLM component
- Find 'e' in the Required Variables popup
- Click to mark it as required
- Now the component will only execute when 'e' contains data, regardless of other inputs
Getting Started
With this introduction, you should be able to get started with Arkai. You might still need to generally read each component's documentation to understand how to use them, but this should give you a good starting point.
For details on publishing or versioning your workflow, refer to Saving Workflows.
If you have any questions or need further clarification, please reach out to us in our Discord, we're happy to help you!